Saturday 24 February 2018

Sgt Frog Plush


In between costume fabrication, I was also sewing up a Sgt. Frog plush. The one I made, is of Sgt. Keroro of the anime Sgt. Frog (the same makers of Gundam).


So because this is a plush, I had to make a sketch first, for the size and shape I wanted. Then, I created a mock-up based on the sketch I made. 


Here's what the complete torso looks. It's made out of flannelette and felt for the star.


Here's the face, I'm in the process of embroidering the eyes.


Sgt. Keroro completed.


Here's a better look of the embroidery work around the star. I used a satin stitch for most of the embroidery work.


I added embroidery floss between the fingers to give them more of a define shape.


I embroidered the tiny star on his hat. Sorry for the blurring picture.


For the mouth, I embroidered with a floss that's between the two different colours of felt.


Here's the back of the plush.


Sgt. Keroro with a Gundam.

Sunday 18 February 2018

Ruby Rose at Animaritimes and Hal-con


Here's all the contestants of the Animaritimes Masquerade (I think I'm in there, somewhere...) . 


Someone posted an image of me on the Animaritimes Facebook page.


I won 2nd Place in the Journeyman Division.


Here is a photograph of me, taken at Hal-con, by Mike McCarthy. Coolest photo-shoot ever, you get to pick the background you want to be in.


I apologized for the print out, but blogger does like pdf's. I won 1st Place in Craftmanship in Sewing!!!

Ruby Rose Part 2


For the Ruby outfit, her "battle skirt" needed be a lot more puff. I created a crinoline for the extra puff.


This was my first crinoline. it's not prefect, but it serves it's purpose. 


This is the pattern I based my dress from.


This is dress put together. You can see some of the crinoline peeking out.


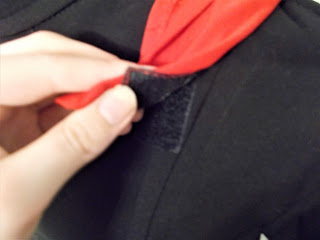
On the front of the dress, I attach some Velcro where the cape will hang. You can also see some of the top stitching I've done.


In the back of the dress, you see where the zipper is. I attaching some Velcro to the collar, so it's easier for me to adjust it.


Here's the collar, I used the same pre-gather ribbon as the spats.


Here's a better look at the ribbon.


In the images above, is the outfit with the cape attached.


See how Velcro works.


Repainted sniper bullets.


Here's 75% of the outfit together. I realized that  Ruby's corset is a solid black, but you wouldn't be able to see it as well, especially far way on a stage. 


Here's a better look of the corset and bullets.

Ruby Rose Part 1


So for 2017, I've decided to cosplay as Ruby Rose for the series RWBY. In the image above this is Ruby's outfit she wore thought out volume 1 up till volume 3.


For my Ruby outfit, instead of buying new boots, I have  decided to make spats to covering for the boots I already have. So with the boots, I just taped the bottom of the them since that's all you're going to see.


I repainted some small buckles that will be attach the strap of the spats.


So, this is what my spat looks like so far. The fabric I used for the spats is black, soft-stretch vinyl. For finishing the vinyl edges I glued them down first, and then top stitch those edges to secure them. I sewed on pre-gather ribbon to the top, and attach elastic loop for the lacing.


For the strapping I used a strip of vinyl. Then I sewed on a square to one end of the strip to the spat. Finally sewed an "X" through the center of the square to secure strap on.


I also added top stitch to the straps to match the spat.


For the under strap, I used elastic.


Here what it looks like all together.


I used Velcro to attach and adjust the strap if needed.


I bought some cross charms and pins backs for Ruby's cape. First I used card-board and glue to attach the crosses and pin backs together, which didn't work to well. Then someone suggested to use PC Putty. It worked great, but really stunk.


Pretty, but smelly.


Here is the corset. My only problem I had making the corset was with the grommets. The hole punch wouldn't go through the fabric, it was either I was to weak or the hole punch was to dull (I think it was both). 


Zoom-up of my stitch work.


This the emblem for the belt buckle. I used card-board, craft foam, and paint.


I attach a kilt pin to the back.


Here's the pattern I used for the cape.

For my first cape I used knit fabric, but it was way to heavy. In the picture above, is my second cape made from satin. 


Here's the front of the cape.